Using the portal (for customers)
The portal is where you raise support requests, follow what’s happening to them, and see everything your organization has open. You can do all of it by email instead if you’d rather — but the portal is where you can see the whole picture at once.
Signing in
Section titled “Signing in”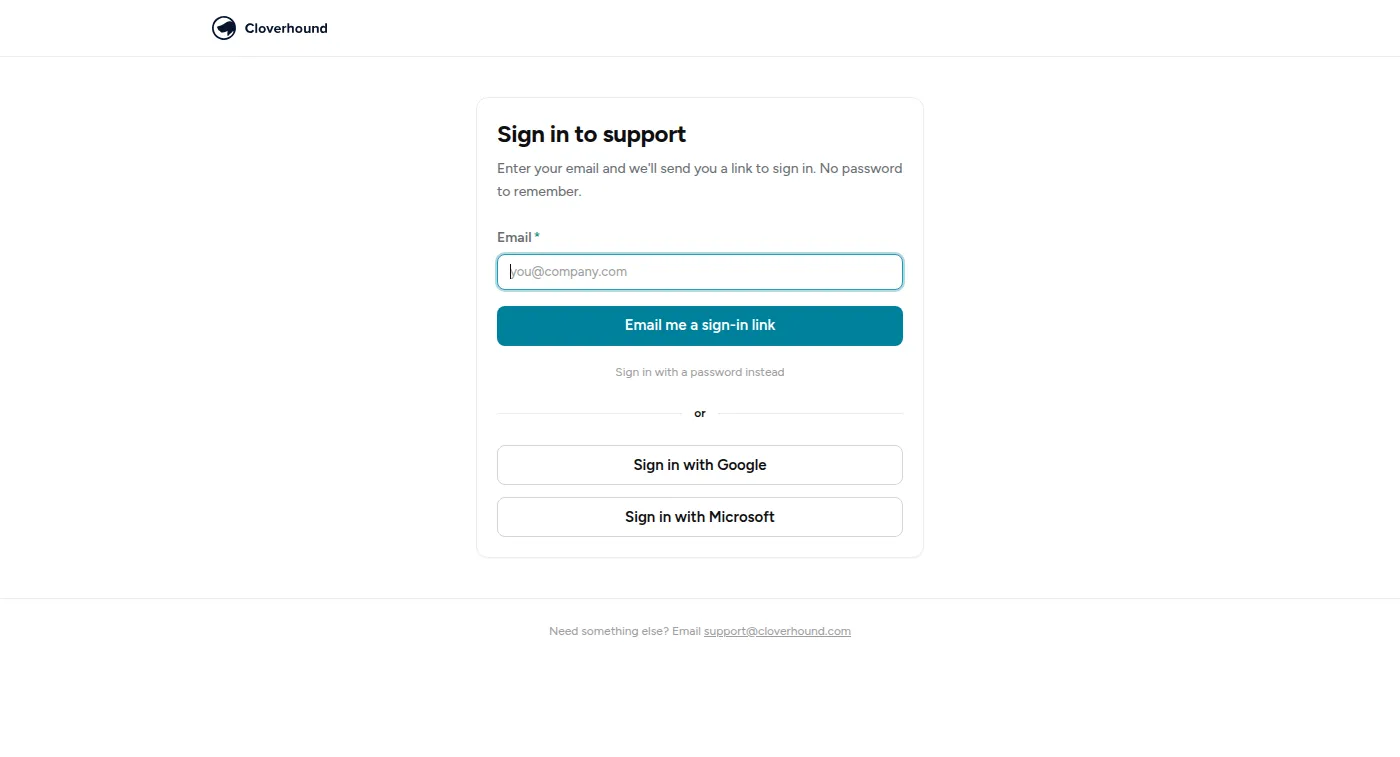
There are up to four ways in, and which you see depends on how your supplier has set things up:
- A sign-in link by email. Enter your address and you’ll be sent a link. Nothing to remember, and it’s the default.
- A password, if you’ve set one — Sign in with a password instead.
- Google or Microsoft, if your supplier has connected your company’s normal work login.
You’ll be asked to confirm before you’re signed in. That extra click is there because email systems follow links automatically to check them for viruses, and without it your one-use link could be spent before you ever clicked it.
Your requests
Section titled “Your requests”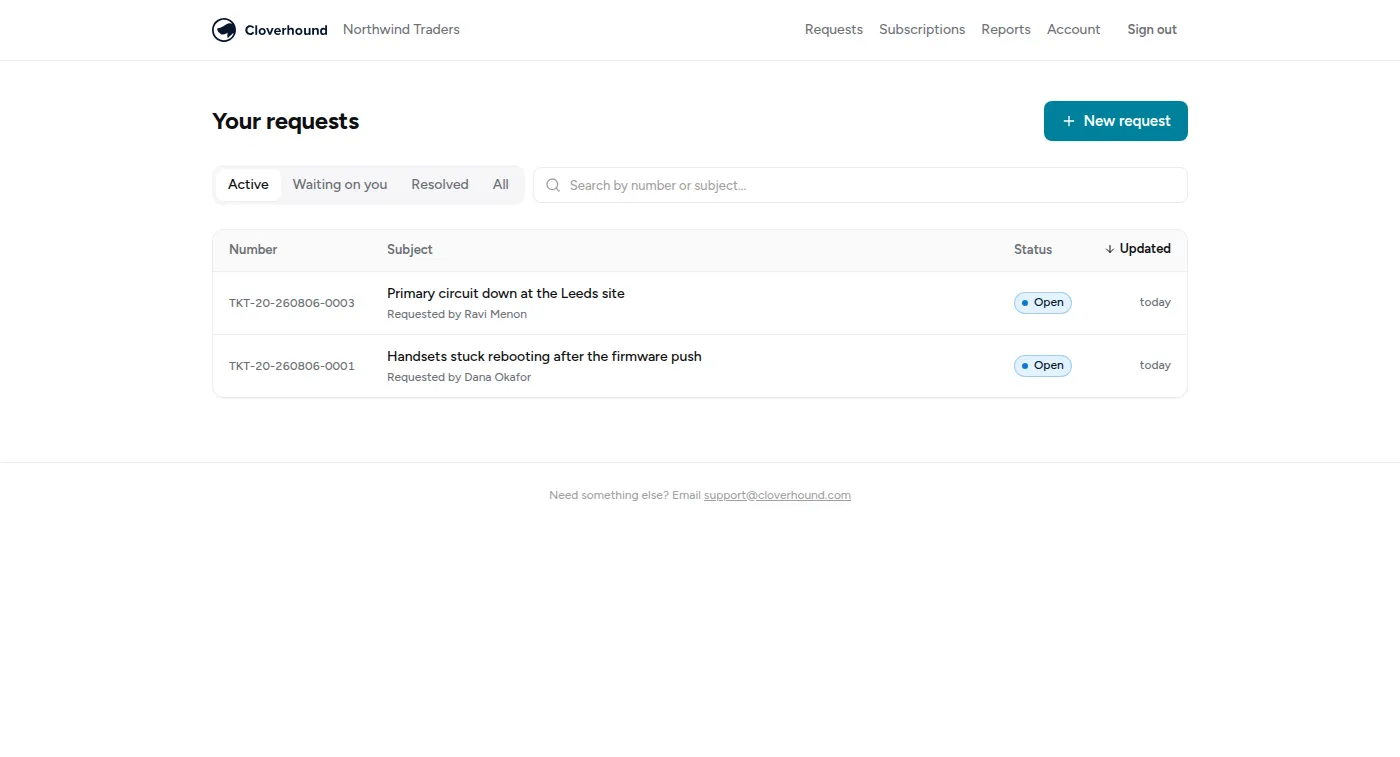
Every request is listed with its number, subject, status and when it last moved. The tabs across the top are the ones you’ll use most:
| Tab | What’s in it |
|---|---|
| Active | Anything still being worked |
| Waiting on you | Requests we’ve asked you something about |
| Resolved | Done, but still readable |
| All | Everything, including closed |
Waiting on you is the one worth checking. A request sitting there isn’t being worked on — it’s waiting for an answer from your side, and it’s the most common reason something seems to have gone quiet.
You can search by number or subject, which is the fastest way back to a request you’re already discussing over email.
Depending on how your access is set up, you’ll either see only your own requests or everything your organization has raised. If you’re seeing colleagues’ requests, that’s intentional; if you need to and can’t, ask your supplier to change it.
Raising a request
Section titled “Raising a request”New request asks for very little:
- Who this request is for — only if you’re attached to more than one organization.
- What you need help with — a short summary. This becomes the subject.
- Details — what happened, and what you expected instead.
- Attachments — up to 5 files, 20 MB in total.
The single most useful thing you can put in the details is what you expected to happen. “The report is wrong” starts a conversation; “the report shows 40 hours but the timesheet shows 45” starts the work.
Following a request
Section titled “Following a request”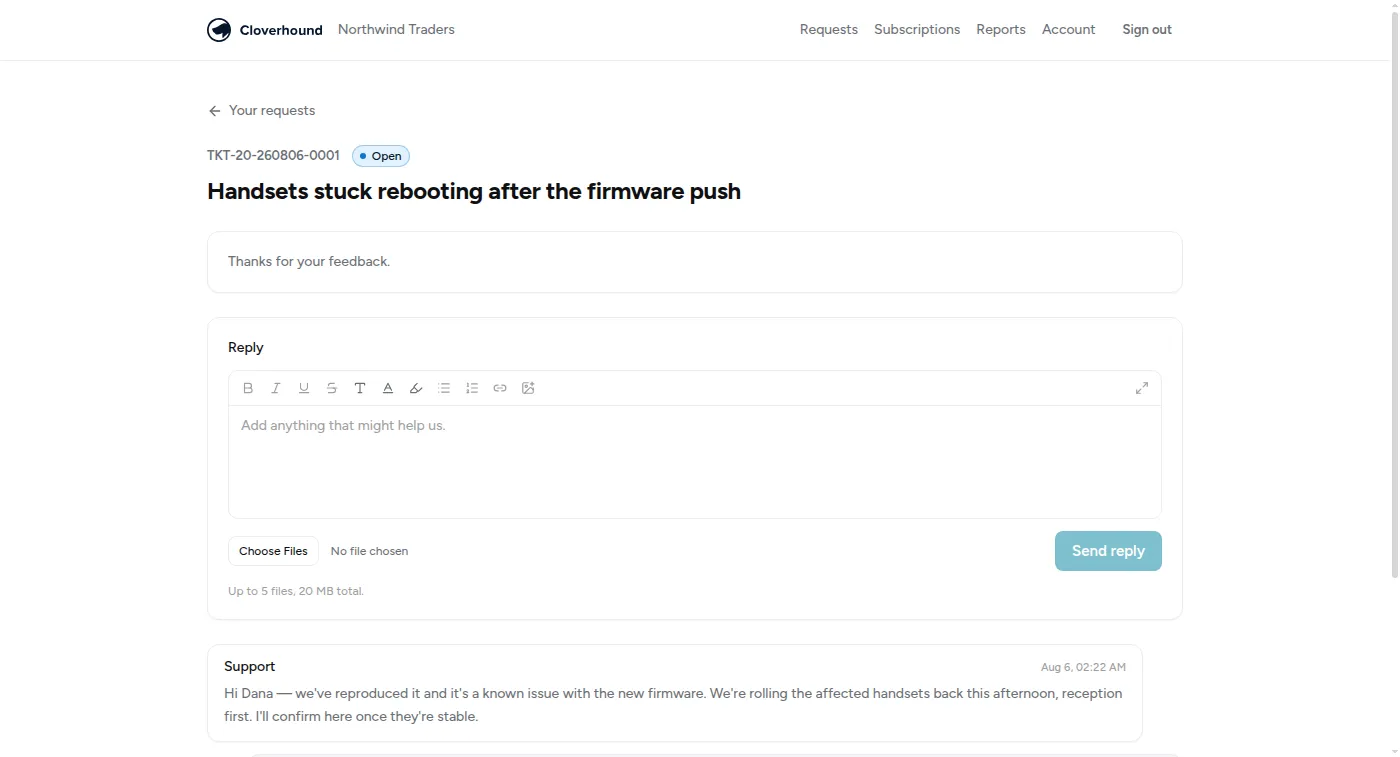
Open a request and you get the whole conversation, newest activity first, with a reply box at the top. Replying here is exactly the same as replying to the email — it lands in the same place and the same people see it.
You can format your reply, paste screenshots straight in, and attach files on the same 5-file, 20 MB allowance.
Rating the service
Section titled “Rating the service”When a request is resolved you may be invited to rate it — one to five, with an optional comment. It takes a moment and it’s the most direct signal your supplier gets about whether the help was any good.
The comment box matters more than the score. “5” tells them nothing they can act on; “fixed quickly but I had to chase twice for an update” tells them exactly what to change.
Not every request gets a survey — some teams and some kinds of work have them switched off — and you can opt out of being asked at all from the link at the bottom of a survey email.
Subscriptions, reports and your account
Section titled “Subscriptions, reports and your account”Three more things live in the top navigation:
- Subscriptions — what your organization is paying for, and when each thing runs out. Worth a look before a renewal conversation rather than during one.
- Reports — your own request history: how much you’ve raised, how quickly it’s been dealt with.
- Account — set or change a password, turn on two-factor authentication with an authenticator app, and manage which emails you get.
If you turn on two-factor authentication, save your recovery codes somewhere other than the phone with the authenticator on it. They’re the way back in if you lose the device, and the most common way people lock themselves out is storing both in the same place.